Article created by Tom Bergfeld.
This article was written for MonitorWare Agent, but it can also be applied to EventReporter and WinSyslog.
By default the log files generated by MonitorWare Agent using the WriteFile Action are written on a daily basis, so you have one log file for each day. Over time this can become a huge number uncompressed log files, so you properly want to archive them automatically to save disk space. There is no inbuilt method in MonitorWare Agent yet to do so, but this article will describe how you can archive this goal by using the Windows Task Scheduler and Adiscon’s LogZip.
1 Installing and Configuring MonitorWare Agent
1.1 Download and Install MonitorWare Agent
So if you haven’t done so already, go to www.mwagent.com and download the latest MonitorWare Agent version. It is always recommended to use the latest Version of MonitorWare Agent. Once the download is done, go ahead and install it. You may have to restart after installation, this depends on your system.
1.2 Setup basic MontiorWare Agent configuration
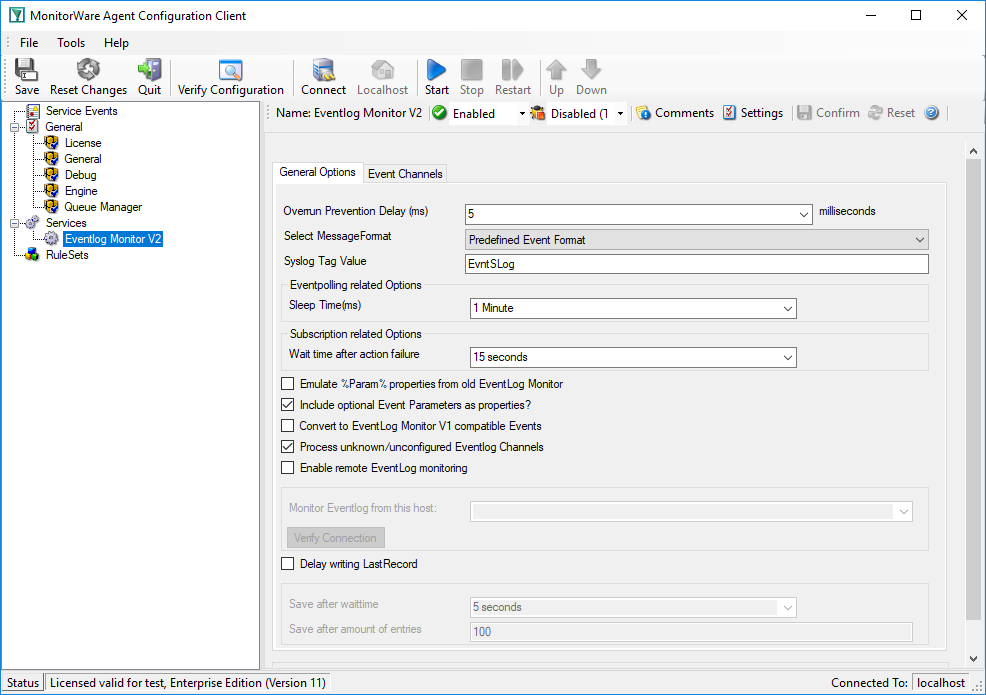
Start the MonitorWare Agent client and skip the wizard on startup. In this article, we will use an EventLog Monitor as source for our File logging, but you can use any other kind of source. Create a new “EventLog Monitor” service and
just name it “EventLog Monitor”. You can leave all configuration settings as they are in the screenshot on the right.
1.3 Configure the Write File Action
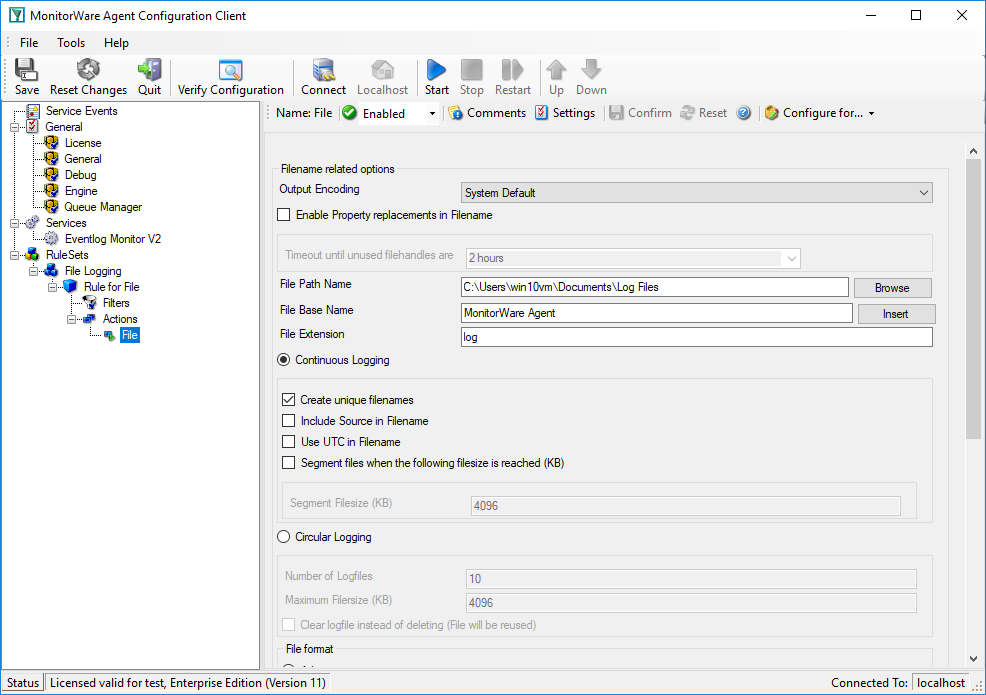
In order to create log files we need a Write File Action. Create a new Write File Action like in the screenshot on the right. The default settings will create daily log files automatically. You may customize the log format by using the custom “File format” option. It is important to have the “Create unique filenames” Option enabled, this will enable the daily written log files.
The log file name for 2018-03-01 would be MonitorWare-2018-03-01.log, and for the next day MonitorWare-2018-03-02.log and so on.
1.4 Start MonitorWare Agent
After you configured MonitorWare Agent, you can start the Service and verify that the daily log files are successfully written.

2 Zipping the logs
For zipping the logs the first thing you will need is LogZip, a free tool from Adiscon. To download the current version of LogZip please visit LogZip.
Setting up LogZip is very easy. The only thing you have to do is to download the zip file containing the application and extracting it to a folder of your choice. No installation is needed and you can directly run the application. Please ensure, that you have the Microsoft .NET Framework installed (this is standard on Windows XP and above), else LogZip will not work. To test the LogZip tool open a ‘dosbox’(=‘cmd’ or ’Command Promt’). Switch in this Command Promt to your LogZip folder. (c:\logzip for example). LogZip has a lot of available options to use as you can find in the man.rtf. But we need the following command line: logzip –b=c:\temp –e=log –p=* -r=on –s=on
Please note that you have to adjust the temp folder with the folder that is given in your “write to file action” in your MonitorWare Agent Configuration client. What the single options stand for you can find in the man.rtf in your LogZip folder. With this command line we zip the logs, in the temp folder, from a day before and replace the log file with a zip file. This command searches also in every subfolder for .logs to zip them, as example, every given “IP” subfolder in your temp folder. For automating this we use a Windows feature called “Task Scheduler”.
3 Setting up a scheduled task
For setting up a new task, there are some steps that need to be done. Go to the search bar and search for “Schedule Tasks”.
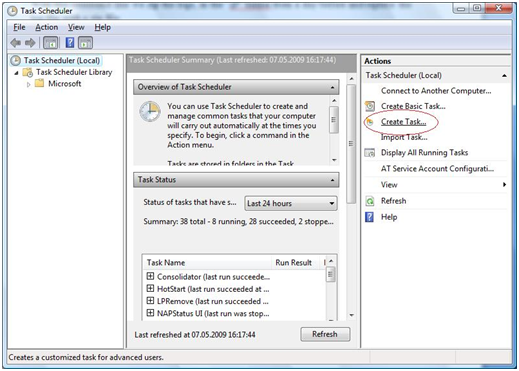
1. Open you Task Scheduler window. In there, choose “Create Task…”.
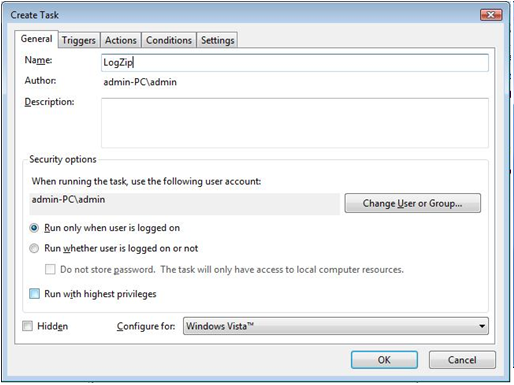
2. A setup wizard will open. You can give your task a name here if you want.
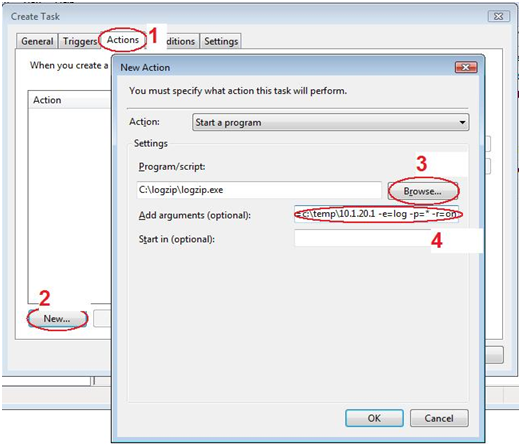
3. Switch to the tab ‘Actions’(1) and click on ‘New’(2). Another window opens. Click on ‘Browse’ (3) to search for the logzip.exe and add the command from above in the ‘Add arguments’ field (4) (–b=c:\temp –e=log –p=* -r=on –s=on ). Click ‘OK’ to finish this.
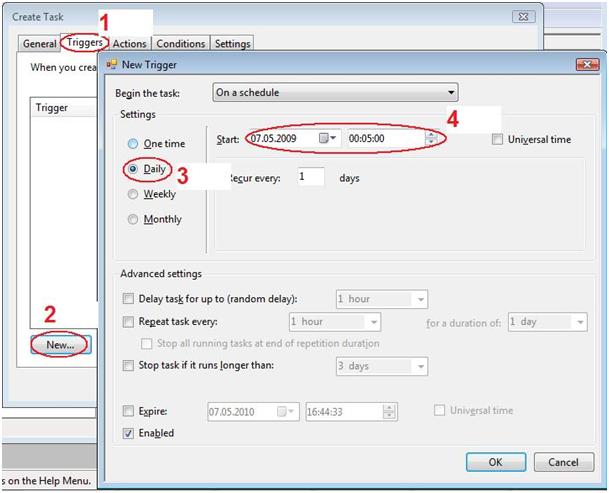
4. Switch to the tab ‘Trigger’(1) and click ‘New’(2) to setup the time interval for doing the action (zipping). Another window opens where we can adjust the time for doing the action. Because we want to repeat this action every day we mark ‘Daily’ (3) and select the time when the task should be start (4). Click ‘OK’ for finishing this.
Well, now you have got a small but effective zipping tool.
Final Thoughts
We hope this article will help you solving your tasks and shows you the potential of MonitorWare Agent, and what you can archive with it. Feel free to email us for recommendations or questions.